How to make a Fibreglass Mould

Removing the mould from the pattern

Finding a reliable and skilled fibreglass repair service near me can be a challenging task, especially for car enthusiasts aiming to enhance their vehicle's fibreglass car body for peak performance and aesthetics.

We collaborate with Formex Fibreglass to glean insights into the fibreglass mould making process, a valuable skill for creating precise fibreglass body panels.

By mastering how to make fibreglass moulds, car owners can forge custom fibreglass car parts that are both high-quality and economical. This knowledge is a boon for those who may not have easy access to a specialized fibreglass company or those who prefer the autonomy of DIY fibreglass repairs to cars.

This is particularly useful for those who may have trouble finding a trusted fibreglass company, or for those who want to take matters into their own hands and become more self sufficient in their car maintenance. 

Replacing, replicating or repairing a body panel doesn’t have to be as difficult as you might think. Weymouth’s Formex Fibreglass, a reputable fibreglass specialist, demonstrates how to create a fibreglass mould from scratch.

They use a 1965 Dodge Dart bonnet as an example, highlighting the fibreglass properties that make it an ideal material for automotive enthusiasts strength, weight efficiency, and cost effectiveness compared to alternatives like carbon fibre.

This is a great example to show, because of the size of the panel there are some challenges to overcome, which will become clearer further down. 

Many car enthusiasts, will choose to use fibreglass panels because of its unique properties in strength, weight saving and it is far more economical than using carbon fibre. 

For enthusiasts seeking additional guidance on fibreglass fabrication, Fibre Glast offers a treasure trove of information on fibreglass materials, techniques, and best practices to ensure the success of your fibreglass body kit projects.

Chopped strand mat

What is a fibreglass mould?

A fibreglass mould is often used in the car industry to make other parts out of fibreglass sheet, such as fibreglass body panels. 

To create these parts, a fibreglass mould is first made by applying layers of fibreglass mat and resin over a pattern or plug. 

Understanding what is chopped strand mat is also essential, as it forms the structural base for our fibreglass moulds. Engaging with Formex Fibreglass, we delve deep into making fibreglass moulds, a technique that champions innovation.

Once the mould is complete, it allows for the repeat production of identical parts with precision and quality, including complex shapes for custom designs. 

The mould can be used repeatedly to produce fibreglass body panels, making it a cost effective solution for those who need to replace damaged or worn out parts after a hard weekend of racing. 

To complement the practical know how, Fibreglass Warehouse extends a catalogue of resources, essential for those ready to explore the fibreglass mould making world further. They offer not just materials, but also the wisdom to navigate the complexities of fibreglass materials and their application in creating fibreglass panels.

What you will need

Here is a list of what you will need for the mould making process: 

  • Release agent: A Substance designed to prevent adhesion between the pattern and the mould. 
  • Filleting wax: Similar to plasticine, can be used to fill small holes or create radii.
  • Gel Coat: A Thixotropic resin which forms the surface layer of fibreglass moulds and parts.
  • Catalyst: Often wrongly referred to as a “hardener”, it’s a chemical which triggers a reaction in the polyester. 
  • Chopped Strand matting: Glass strands randomly laid and held together with a binder.
  • Resin: Combines with chopped strand matting to create the fibreglass composite material. 
  • Fumed Silica: Serves as a universal thickening agent


For all the supplies you need for the mould making process, including release agent, filleting wax, gel coat, catalyst, chopped strand matting, resin, and fumed silica, TAP Plastics offers a comprehensive selection. They provide step-by-step instructions and a variety of mould making materials and supplies to fulfil any project requirement. You can explore their offerings and find the right components for your project at TAP Plastics Mold Making Supplies.

Equipment and fibreglass tools you will need for the mould making process

  • Release agent and cloths to apply it with
  • Filleting wax
  • Ball tool
  • Mixing buckets and mixing sticks
  • Catalyst dispenser
  • Paint brushes and rollers
  • Consolidating rollers
  • Plastic Wedges
  • Power Tools, angle grinder – various sizes.
  • Hand finishing tools, Permagrit abrasive blocks are great for fibreglass

Inspect the pattern

Original 1965 Dodge Dart bonnet.

As the mould will serve as the base for any other future panels, we must do a good job inspecting it for an accurate desired shape and to find any imperfections it may have, as anything slightly off to begin will be transferred onto the part. 

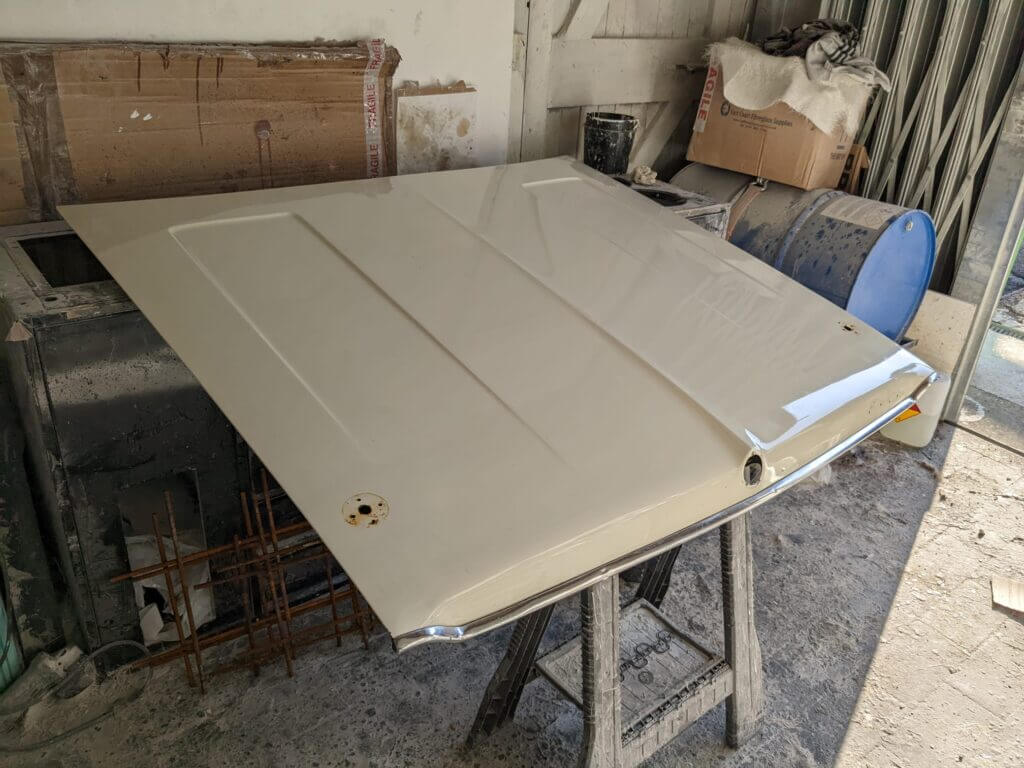
"Before starting the mould making process, it is important to check the pattern carefully. One thing to check for is any surface imperfections which will transfer onto the mould surface. It is also important to check that there are no features on the pattern that could lock the mould in place, common features are undercuts or return edges. This bonnet had a good surface quality and no locking features so was perfect for a one piece fibreglass mould. The holes for the hood emblem and bonnet pins were taped over neatly with flash tape.

In the next stage of the process, we will look at the preparing the pattern to make the mould. 

Preparing the pattern

On this particular project, because the bonnet is made from steel, it is relatively easy to work with, as it generally has a solid smooth surface.

Any imperfections found in the first step can be rectified by using a filleting wax, which is similar to plasticine and can be used to fill small holes or create radii. 

Ensure that the surface of the pattern is completely clean and dry. 

Once this is done, you will need to apply a releasing agent or a carnauba wax. You will need to follow the instructions on the product here, because there can be many different brands available in the market, and their quantities and usage may vary. 

"Once the pattern is ready, it needs to be released with an appropriate release agent such as a chemical release or Carnauba wax. Following the instructions on the release agent. Any crevices can be filled with filleting wax. On this project, 4 coats of carnauba wax were used to release the pattern. There was a small gap between the chrome trim and the steel bonnet. This was filled with filleting wax and a ball tool was used to create a nice neat radius. It is important to do this neatly as it will transfer onto the surface of the mould. .

How to apply a gel coat

Now this is where the fun begins. 

A gel coat is a formulated based resin that is applied to the surface of the pattern. This will help create a high quality finish on the mould once it’s released.

When you paint a car, you may often hear someone say “It’s all in the prep work” Well laying up a mould is no different, and applying the gel coat is a little bit like laying the foundations of the mould, you have to spend the time here to get it right, as the quality of the finished panel will depend on applying the gel coat correctly. 

What happens here: 

  • Make sure the mould is free of any debris or dirt. 
  •  Mix the gel coat with an appropriate amount of catalyst, this will start a chemical reaction and cause the gel coat to cure.
  •  Apply the gel coat to the surface of the mould.
  •  Use a brush to evenly apply the gel coat across the mould making sure there is an even consistency all over. 
  •  Allow for the gel coat to cure. The temperature will influence the cure time here, so be cautious if you are doing this job in the heat of the summer. 
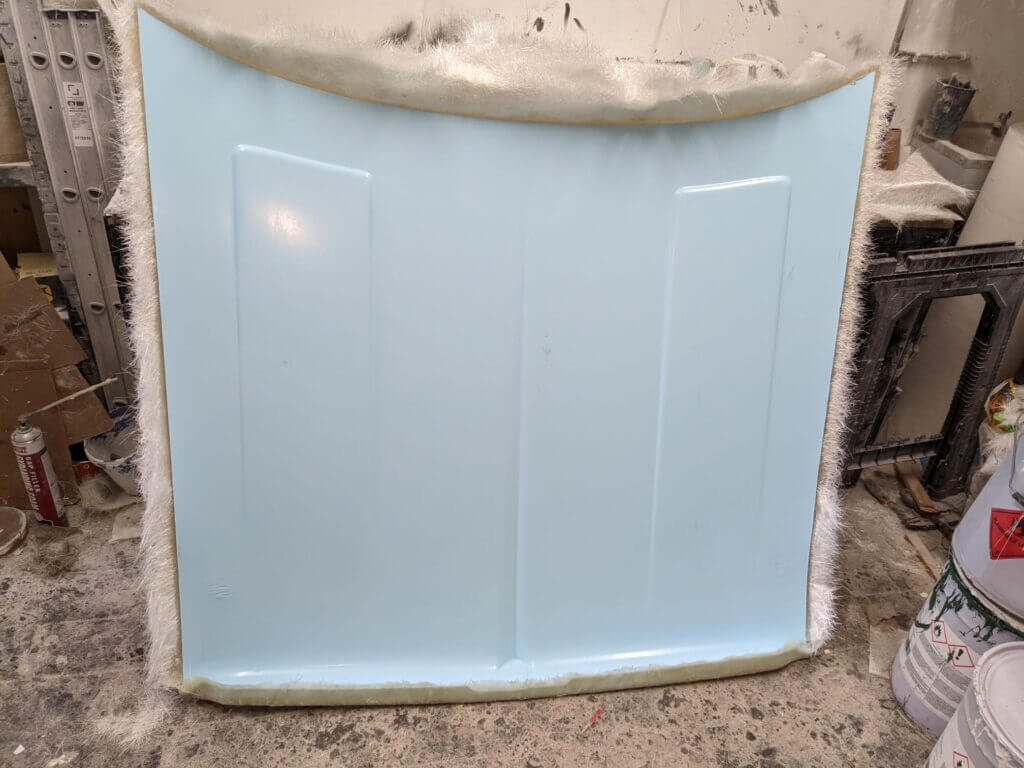
"“An appropriate gel coat should be selected. Normally for moulds, a specific tooling gel should be used but because this mould isn't going to be used many times, a cheaper general purpose gel was used. A small amount of blue pigment was added to the white polyester gel to create a sky blue gel coat. This will make it easier to see where the white gel coat has been applied when using this mould; if the mould surface is the same colour as the finished parts it is very difficult to see where the gel coat has been applied. Carefully consider how much catalyst to add to the gel coat then mix thoroughly. Apply an even layer of gel coat over the whole pattern, aiming for around 1mm of thickness.”. .
How to apply a gelcoat

Laminating the first layer of chopped strand matting

Next, we begin by laying up the first layer of chopped strand matting

This is also known as a fibreglass mat or fibreglass sheet and it is made up of multiple strands of glass fibres randomly arranged, which are then randomly bound together with a resin to bind it all together. This is cut to the shape of the mould, but just a little bigger to allow it to reach all the corners, this excess is then trimmed at the end of the process

This is then laid over the area which has just been gel coated, the chopped strand matting is then saturated with resin, which is either applied with a roller or a brush, making sure all the matting conforms to the pattern and pushed into all of the corners and creases. 

This layer is then forming the structural foundation of the mould, and as you see further down other materials can be added to help increase the desired strength of the mould, whilst helping to prolong its accuracy and durability. 

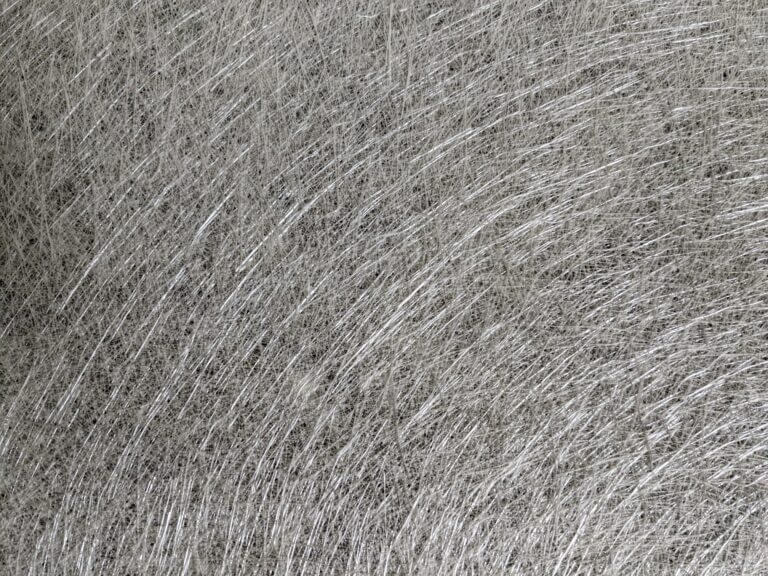
"“Check if the gel coat has correctly cured and is ready to laminate over, it should be tacky to touch but no colour should transfer onto your finger. Measure out and prepare the first layer of chopped strand matting (CSM). If there are any intricate details on the pattern, such as the radius between the chrome and steel on this panel, a paste of catalysed resin, fumed silica and chopped glass fibres should be spread into the detail to ensure there won't be a void between the gel coat and the CSM. The first layer of CSM can be laminated over the top of the cured gel and wet paste. Special care should be taken on the first layer to avoid air voids. Consolidating rollers should be used, as well as stippling with a paintbrush, to ensure the CSM is in full contact with the gel and paste. A bristle roller was used on this project.”. .
First layer of chopped strand matting

Finishing the main laminate

When adding additional layers of laminate, it’s important to make sure we keep each layer free of any contaminates or dirt, as these can create imperfections or weak spots in the mould. 

A common mistake is not letting each layer cure slightly before starting the next layer, as the old layer needs to support the weight of the new laminate, also adding a layer too soon can cause the previous layer to deform or shift. 

Continue with adding the appropriate amount of mixed resin as per the manufacturer’s guidelines, and ensuring the resin is distributed evenly within the chopped strand matting. 

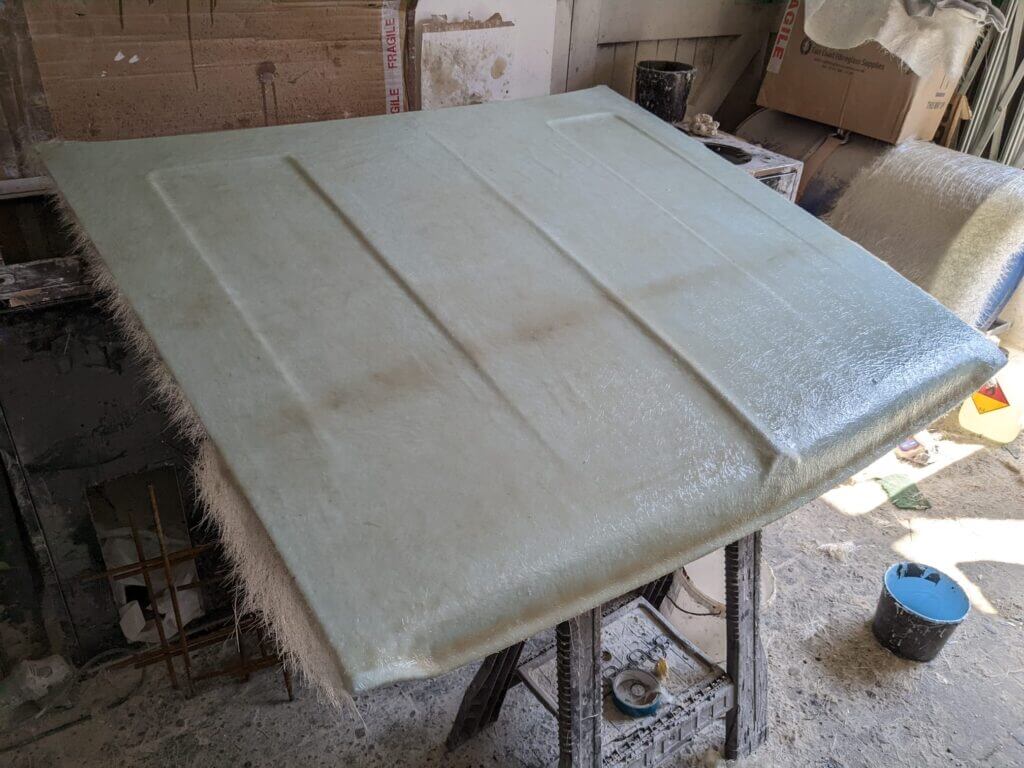
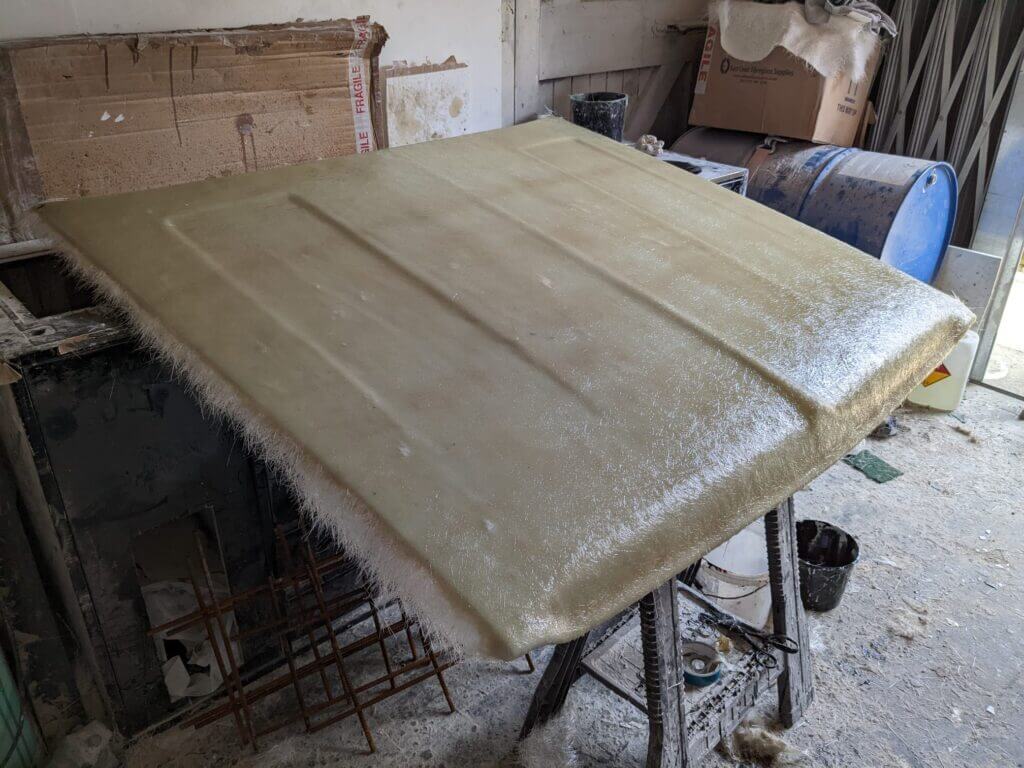
"“The first layer should be left to cure, at least to a B stage, if not fully, before the main laminate is put down to prevent the first layer from being disturbed which could introduce voids. If the first layer is fully cured, it should be abraded and dusted down before laminating to aid the adhesion of the subsequent layers. Prepare 3 layers of CSM and the necessary amount of resin; it may be better to prepare several smaller batches of resin to prevent an exothermic reaction from happening in the bucket. Each layer should be applied individually, making sure that overlaps or joins are in different places on each layer so that there isn't a weak point. Consolidating rollers should be used to expel any air”. .
Adding extra layers of chopped strand matting

Adding reinforcement (optional)

Adding strength to a large area can be crucial when making a fibreglass mould to maintain accuracy. These are a few reasons why you should consider it:

  •  Adding strength over a large area such as this bonnet will prevent the mould from deforming or warping under pressure. 
  •  Adding strengthening supports can help spread the load. 
  •  More durable, which means it’s easier to transport without damaging it. 
  •  Repeatability, if you are thinking about making multiple panels from one mould then it is highly recommended to add additional strength. 

You can achieve this in several ways such as using strong hard woods to create ribs or braces. 

For this Dodge Bonnet, a very simple but effective steel rebar was used over the large area. This was then glassed to the existing layers with an additional 2 layers of chopped strand matting to integrate it into the mould. 

Just remember how heavy this is getting, as you might need a mate to give you a lift with it after you have finished. 

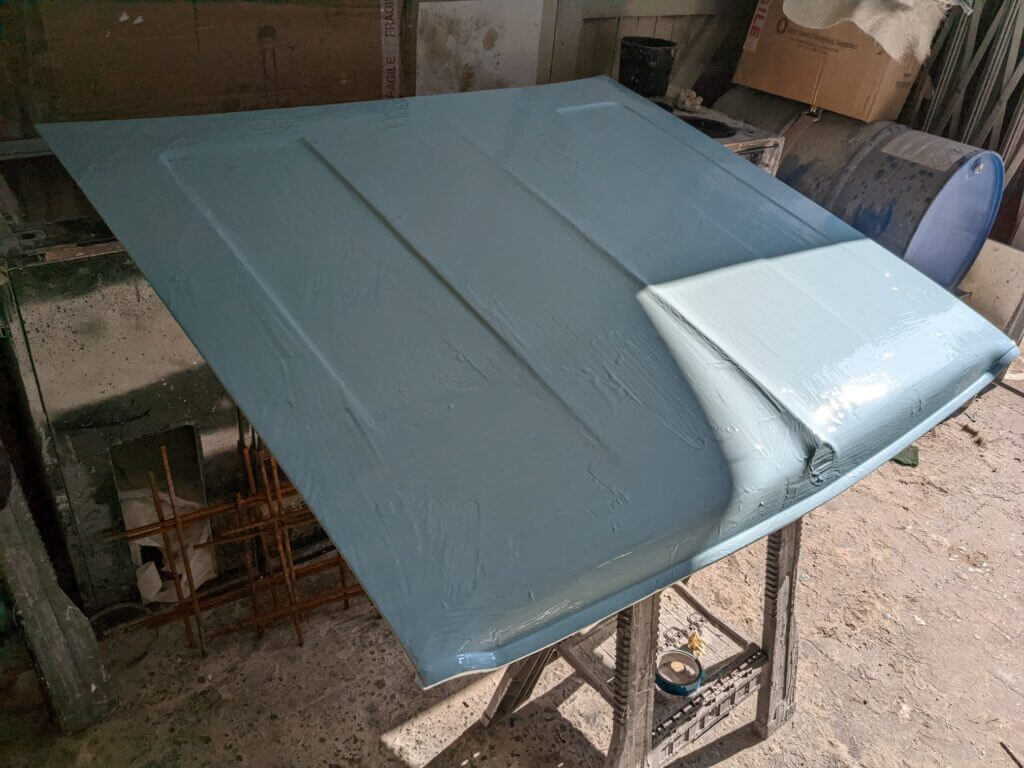
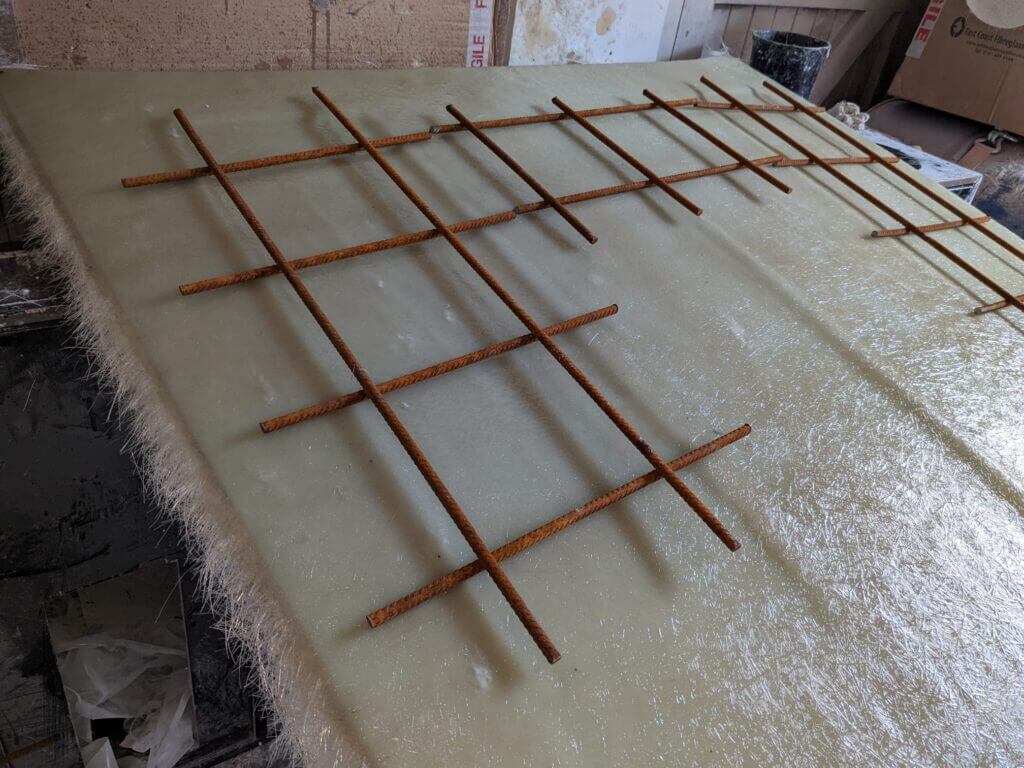
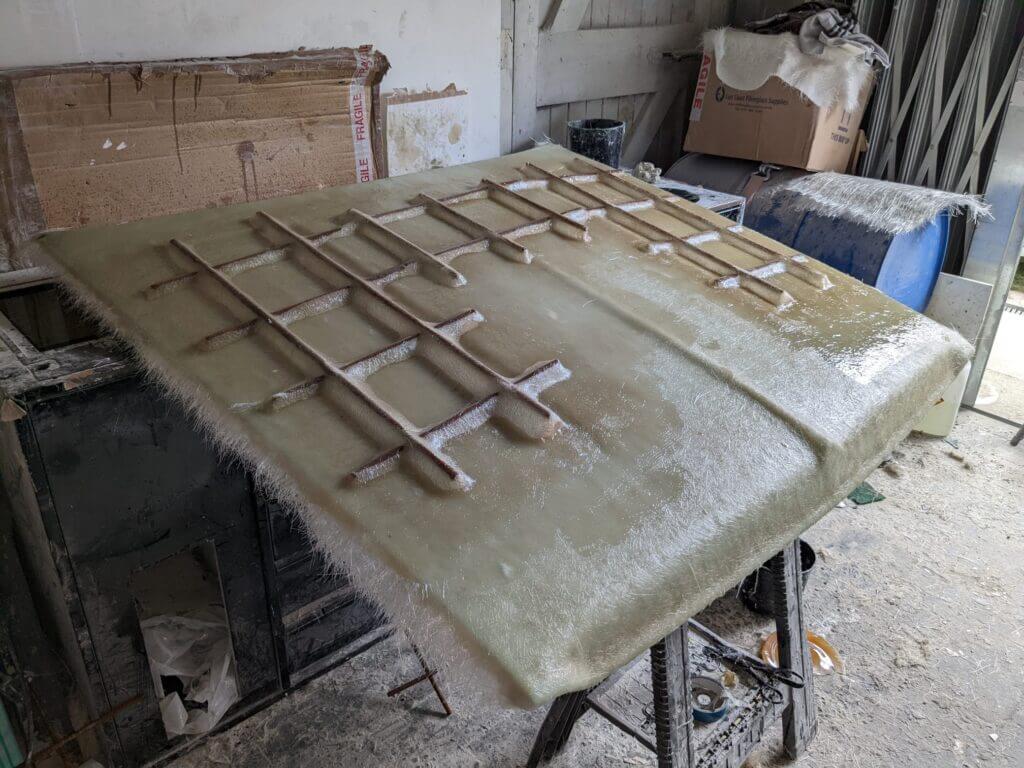
"“This is an optional stage but it can seriously prolong the life of a mould, as well as improve its dimensional accuracy. The cure and preparation are the same as in the previous stage. Reinforcements range from foam core to timber or metallic frames, encapsulated in more layers of CSM. Because this bonnet is so flat, there is little shape to give rigidity to the mould. For that reason, some steel reinforcement bar was placed over the flat areas and a further 2 layers of CSM were added and consolidated”. .
Steel Rebar was used for additional strength
Steel rebar glassed in and laminated on top.

Removing the mould

After the laminating process is completed, the next step in creating a fibreglass mould is to remove the mould from the original pattern.

This can be a difficult and tricky process, as the mould needs to be removed without damaging it. 

It is important to leave the mould in place for as long as possible, to ensure that it is fully cured and hardened. Rushing the process can result in a damaged or unusable mould, and we don’t want to be undoing all the hard work put in so far. 

To remove the mould from the pattern, it is important to use the right tools and techniques. The mould can be released from the pattern by gently prying it away, using a release agent to lubricate the interface. In some cases, it may be necessary to cut the mould away from the pattern, taking care not to damage the mould itself.

Techniques to consider when removing it: 

  •  Using a soft plastic wedge and shims can help create space between the mould and the pattern. Once there is space you can apply more release agent to ease the separation. 
  •  Using compressed air in between the mould and pattern is also recommended as this can help also gradually loosen it without damaging it.
 

Take your time, and be patient and cautious during this process, as any damage to the mould can render it useless. 

"“Cure times vary based on ambient temperature, ratio of catalyst used and other factors. Moulds should be left on patterns for as long as possible. Removing a mould prematurely can lead to distortion. When removing the mould, be extremely careful because any scratches on the mould surface will transfer onto the finished parts. Plastic wedges are the best tool for safely removing moulds”. .

Trim and finish

Once the mould has been successfully removed, the final step is to trim it to its desired shape and size. 

The most effective tool in this instance was a simple angle grinder, however, if you are producing a smaller mould with more detailed features, then an array of smaller die grinders are also very handy to get between the tight spots. 

Using a rotary cutter with tungsten carbide tips is great for getting a clean finish without it splintering.

To finish the edges, it’s advisable to complete this step by hand for greater accuracy. Start with a course sandpaper and work your way to a finer grit. 

Once you are happy with the edges then you can finally finish the tooled surface of the mould to remove any imperfections and irregularities. As any defects will transfer over to any new panels. 

Rub the surface down using a 1200 grit sandpaper. Using a Dual action sander is great on items like a bonnet as it is such a large surface. 

Then by using a buffing pad with some polishing compound, you can polish the surface to a super smooth finish. 

Wipe off any excess polish and your mould is ready to use!

"“Trim the excess material away from the mould edge using generic cutting tools such as an angle grinder. It's always a good idea to finish the edges by hand to achieve a smoother finish. Or the reverse side of the mould carefully sand off any loose fibres which would be very sharp and dangerous if handled. To achieve the best possible surface on the finished parts, the mould can be rubbed down with P1200 wet & dry then polished with a machine polisher”. .
Removing the mould from the pattern

Conclusion

Creating a fibreglass body panel or embarking on fibreglass mould car panels production can seem formidable.

 However, with patience and detailed attention to the fibreglass layup process, the rewards are worth it. For track day enthusiasts and those in the fibreglass sports cars scene, mastering these skills means producing high quality, cost of fibreglass efficient panels consistently.

Remember, whether it’s repairing fibreglass bodywork or crafting new components, safety comes first. Utilise a high grade respirator to guard against fibreglass dust. Moreover, precise mixing ratio for fibreglass resin is crucial to avoid overheating or, worse, a fire hazard.

In summary, the art of fibreglass fabrication is intricate but satisfying, particularly when you see your fibreglass car moulds come to life, ready for the race track or the custom car show.

Find a fibreglass company near me

Post your job for free

Categories

Automotive Wheel Refurbishment 

Automotive Upholstery and trimming 

Automotive Fabricator

Automotive Suspension Alignment

Automotive Carbon Composite

Automotive Coach Builder

Race car Data Engineer

Engine Builder

Automotive Fibreglass Composite

Automotive Dyno Technician

Automotive Gearbox Specialist

Automotive Transportation

Automotive Electrician 

Automotive Turbo Specialist